
By Brian Bell
Biomedical equipment technicians (BMETs) are faced with a growing number of medical devices, but the same basic electrical troubleshooting methods still prevail. Most electronic issues can be traced back to a handful of common problems.
Power Issues
Issues with the power supply or power delivery can cause various symptoms in an electronic device. Understanding how to troubleshoot power issues is essential for BMETs. It is good practice to start at the wall (line voltage) and work your way to the device power supply. Check outlets first, then cables and finally board supply inside a device. You will need to measure voltage as you go to determine the start of the problem. However, more often than not you will visually see the issue (i.e. a loose connection or damaged cord)
Component Failure
Electronic components can fail due to age, misuse, or manufacturing defects. Identifying and replacing a failed part is often the solution to electronic problems. Using your senses can help you locate the issue. For instance, you can smell burnt resistors, see a burnt fuse, feel the heat from a component or hear an out-of-place noise.
Signal Integrity Problems
Signal integrity problems can lead to issues like noise, distortion or signal loss. These problems can often be traced back to electromagnetic interference from other devices, broken or poor insulation, long cables or cords, poor network connectivity or bad electrode contact.
Fuses
Fuses are essential to electrical circuits, protecting the system from excessive current and potential damage. Fuses are designed to protect devices, not people of course, there are some safety benefits to having a fuse; however, a fuse is not designed for that purpose. Fuses are designed to cut off power (or “blow”) when the current exceeds its rated value, interrupting the circuit and preventing any harm to the connected devices or wiring. During the process a fuse is destroyed. A fuse sacrifices itself to save the device (quite the hero). In this section, we’ll explore the critical aspects of troubleshooting fuses, including how to identify fuses, methods to confirm their functionality with a multimeter and the process of replacing fuses when necessary.
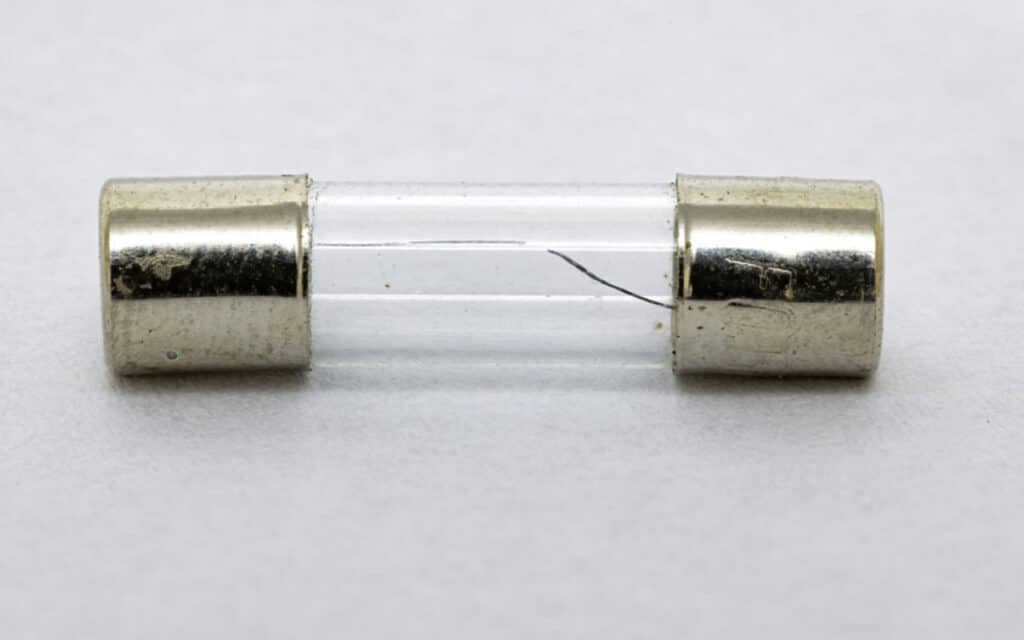
Before you can troubleshoot a fuse, you need to locate it within your electrical system. Fuses are typically housed in a plastic or ceramic casing, often cylindrical in shape. The casing can be clear or opaque, allowing you to see the fuse element inside. Fuses are labeled with their amperage rating, indicating the maximum current they can handle before blowing. The fuse rating is often printed on the casing or on the metal end caps of the fuse. In Figure 1, you can see a blown fuse.
Replacing Fuses
When you suspect a fuse might be the source of an electrical problem, confirm the fuse status before proceeding with any replacements. A multimeter is a valuable tool for checking fuses. Here is how to use a multimeter to test a fuse. First, turn your multimeter on and set it to the “Ohm” or “Resistance” mode (or if you prefer continuity mode). Next, ensure the circuit you are testing is de-energized. Then, remove the fuse and touch the multimeter probes to the metal end caps of the fuse. A working fuse should show low resistance, typically near 0 ohms. If the multimeter reads “OL” (Over Limit) or a high resistance value, it indicates a blown fuse. If your meter is in continuity mode, you will hear an audible sound indicating low resistance. Alternatively, if you are uncertain about the fuse’s status and do not have a multimeter nearby, you can switch out the suspected fuse with one you know is working (ensure the fuse is of the same amperage rating). This can help verify whether the fuse is indeed blown.
Finally, once the new fuse is in place, reconnect the power to the circuit or device. After restoring power, test the circuit to confirm that the issue has been resolved. If the problem persists, there may be an underlying issue that needs further investigation. Troubleshooting and replacing fuses is a basic but essential skill for anyone dealing with electrical systems.
Conclusion
In summary, troubleshooting electronic issues often revolves around understanding common problems such as component failure, power issues, signal integrity problems and faulty fuses. By using your senses and basic diagnostic tools, you can identify and address these issues effectively. Key takeaways include the importance of systematically checking components, verifying power, maintaining signal integrity, and correctly identifying and replacing blown fuses. Mastering these fundamental troubleshooting techniques will enhance your ability to diagnose and resolve electronic problems, ensuring the longevity and reliability of your devices.

Citations
Basic Electrical Troubleshooting is based of a section from the book “Essentials of Biomedical Engineering Technology and Healthcare Technology Management” and is used with permission from the author.
